5-Star
Award Winning Service
Award Winning Service

Welcome to our drywall and sheetrock installation guide. We will walk you through the step-by-step process of installing drywall and sheetrock ensuring a professional finish. With the right hanging tools, materials, and techniques, you can transform any space in your home.
Before you begin, gather the essential tools and materials needed for hanging drywall and sheetrock installation:
Begin by inspecting and cleaning the work environment. Remove any debris, old nails, or other impediments to the installation process. To protect your walls and maintain a comfortable living environment, make sure proper insulation and moisture control measures are in place.
When installing drywall, always start with the ceiling. Choose the appropriate type and thickness of drywall for your ceiling, and measure and cut the drywall sheets accordingly. Follow these steps for hanging drywall on the ceiling:
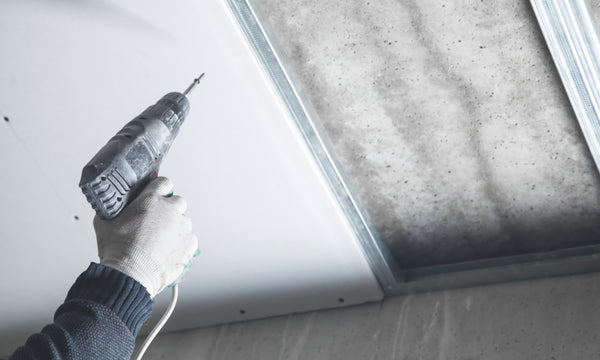
Following the installation of the ceiling, proceed to the installation of sheetrock on the walls.
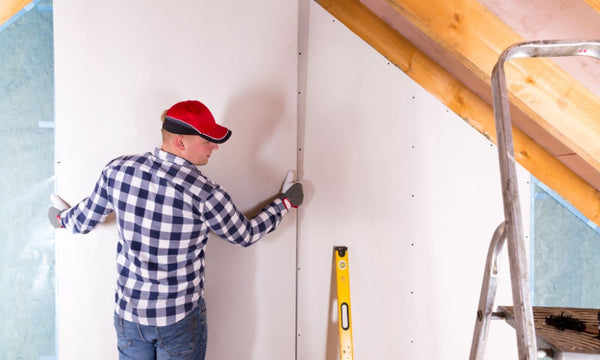
Once the drywall and sheetrock are installed, it's time to finish the surfaces:
With the drywall installation finished, it's time to install baseboards and trim:
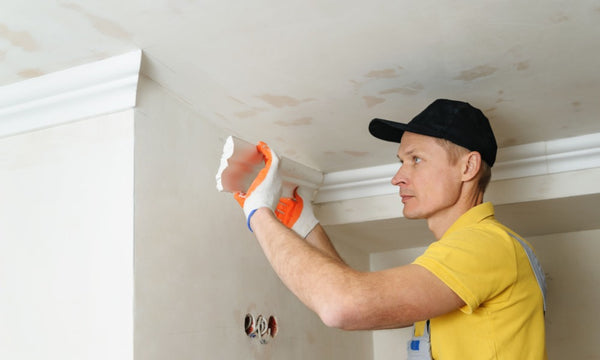
Prepare your newly installed walls for painting and decorating:
Avoid the following common mistakes to ensure a successful project:
Q: What is the difference between drywall and sheetrock?
A: Drywall is a general term for the panels used to construct interior walls and ceilings, while Sheetrock is a brand name of drywall products. Drywall is a generic term for gypsum board, while Sheetrock is a brand of gypsum board. In practice, the terms are often used interchangeably.
Q: What type of screws or nails should I use for drywall or sheetrock installation?
A: Use drywall screws or nails designed specifically for drywall installation. Drywall screws have a stronger hold and are less likely to cause "nail pops" or protruding nails over time. Choose screws that are long enough to penetrate the drywall and reach at least 5/8 inch into the framing. 1-1/4 inch to 1-5/8 inch screws are adequate for most installations.
Q: What is a butt joint in drywall installation?
A: A butt joint is a seam formed by two pieces of drywall or sheetrock that meet in the same plane but do not overlap.
Q: What is the best way to hang drywall on the ceiling?
A: Using a drywall lift can make hanging drywall on the ceiling much easier. Cut the drywall sheets to fit the ceiling and screw them together with butt joints where the sheets meet. If you do not have a drywall lift, having another person assist you in lifting the drywall sheets while installing is recommended.
Q: What is the best way to cut drywall or sheetrock for outlets and fixtures?
A: Measure and mark the location of the outlet on the panel before cutting drywall or sheetrock for outlets and fixtures. Score along the marked lines with a utility knife, then snap the panel along the scored lines. If your material lacks an edge, you can start a cut with a drywall jab saw by piercing the center. Finally, cut through the remaining paper backing with the knife to create the opening.
Q: Can I hang drywall or sheetrock on my own, or should I hire a professional?
A: If you have the necessary tools, materials, and skills, hanging drywall or sheetrock can be a do-it-yourself project. If you are unsure of your abilities, or if the project is particularly large or complex, it may be best to hire a professional.
You can transform your space and achieve a professional finish by following this ultimate guide to hanging drywall and sheetrock installation. Remember that patience and attention to detail are essential for a successful project. You'll be well on your way to creating beautiful, functional walls in your home with the right tools, materials, and techniques. We hope you found this guide useful in your drywall and sheetrock installation journey. Please leave a comment if you have any questions or would like to share your own experiences. At Timothy’s Toolbox, we’re all about helping you with your construction projects and supplying you with the proper tools and equipment to get the job done. For more information, visit our website.

{"one"=>"Select 2 or 3 items to compare", "other"=>"{{ count }} of 3 items selected"}
Leave a comment