Knowing how to fix damaged drywall is a crucial skill to have whether you're a professional contractor or a DIYer. If you have the correct tools and follow a few simple steps, fixing damaged drywall—from small dents and scratches to significant holes—can be a fairly simple task.
Tools You'll Need
Before you start repairing your drywall, you'll need a few essential tools. These tools can be found at any hardware store or online at Timothy's Toolbox. Here's what you'll need:
-
Drywall Repair Patches: These patches are a quick and easy way to fix small to medium-sized holes in your drywall. Common sizes include 4-inch by 4-inch, 6-inch by 6-inch, and 8-inch by 8-inch.
-
Drywall Joint Putty Knife or Spackle Knife: This is used to apply spackle or joint compound to the damaged area.
-
Sanding Sponges or Drywall Abrasives: You'll need these to smooth out the spackle or joint compound once it's applied and dries.
-
Utility Saw: You'll need a utility saw to cut away any damaged or broken drywall.
-
Jab Saw (also known as a drywall saw): This is a type of hand saw that is specifically designed for cutting holes in drywall or other similar materials. It has a long, pointed blade with a serrated edge that is used to make cuts in the drywall. The tip of the blade is usually curved, which makes it easier to start a cut in the middle of a piece of drywall.
-
Hand Sanders: This is used to sand down larger areas of drywall.
-
Spackle or Joint Compound: This is used to fill in gaps or holes in the drywall.
Now that you have your tools, let's move on to repairing your damaged drywall.
Repairing Small Dents and Scratches
Small dents and scratches are common in drywall and are usually easy to fix. Here are the steps to repair small dents and scratches in your drywall:
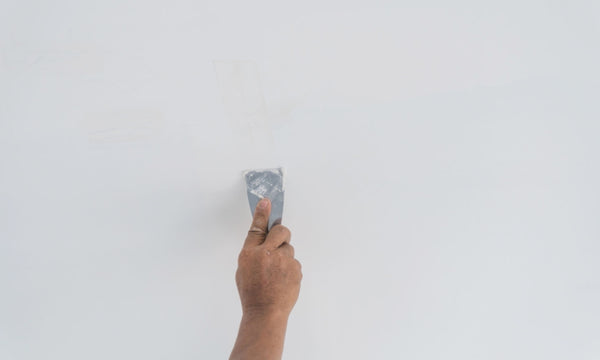
- Use a putty knife or spackle knife to apply spackle or joint compound to the damaged area.
- Let the spackle or joint compound dry according to the manufacturer's instructions.
-
Sand the area with a sanding sponge or drywall abrasive until it's smooth and even with the surrounding wall.

Image showing joint compound applied with a joint putty knife over the damaged drywall. After letting the compound dry you can sand and repeat if necessary.
Repairing Small to Medium-Sized Holes
- Cut away any damaged or broken drywall around the hole with a utility saw.
- Apply joint compound or spackle around the edge of the hole.
- Place the drywall repair patch over the hole and press it firmly into place.
- Use a putty knife or spackle knife to apply joint compound or spackle over the patch.
- Let the compound dry according to the manufacturer's instructions.
- Sand the area with a sanding sponge or drywall abrasive until it's smooth and even with the surrounding wall.
Repair Large Holes in Drywall
Large holes in drywall can be more challenging to repair, but it's still possible to do it yourself. Here's how to patch a large hole in your drywall:
- Cut a drywall patch made from a piece of drywall that is slightly larger than the hole. You can use a drywall saw or utility knife to do this. Cut off about an inch on each side of the drywall piece leaving only the front paper of drywall.
- Cut one or two furring channels made from wood that are slightly shorter than the height of the hole. Make sure the furring channels are wide enough to fit inside the wall.
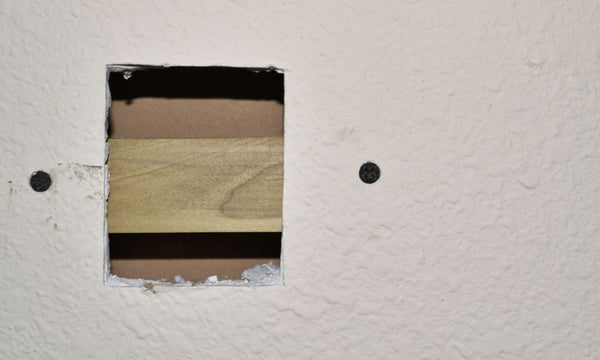
- Insert the furring channels into the hole, making sure they are centered and parallel to each other if using 2 furring channels. If using 1 furring channel place in the middle of the hole. Use drywall screws to attach the furring channels to the inside of the wall.
- Place the drywall patch over the hole and screw it into the furring channels using drywall screws. Make sure the screws are flush with the surface of the patch. The paper of the patch created should overlap where the new drywall was inserted.
- Apply a thin layer of joint compound over the patch, covering the screws and blending it into the surrounding wall. Allow the compound to dry completely.
- After the joint compound has dried, use sandpaper, a sanding sponge, or a hand sander to smooth out any rough spots or bumps. If necessary, repeat steps 5 and 6 until the patch is completely smooth and flush with the wall.

Image showing the wood furring channel attached using drywall screws on each side of the hole.
Conclusion
Finally, with the right tools and techniques, repairing damaged drywall can be a simple and straightforward process. Timothy's Toolbox has everything you need for any drywall repair project, whether it's small dents and scratches or larger holes. Remember to take your time and follow these basic steps, and you'll have your drywall looking like new in no time.


Leave a comment