5-Star
Award Winning Service
Award Winning Service

| Key Takeaways | Details |
|---|---|
| Importance of Proper Sanding | Ensures a smooth, professional finish on drywall after taping. |
| Tool Selection | The right tools can significantly ease the sanding process. |
| Safety Measures | Protecting yourself from dust and debris is crucial. |
| Technique Tips | Techniques for efficient and effective sanding. |
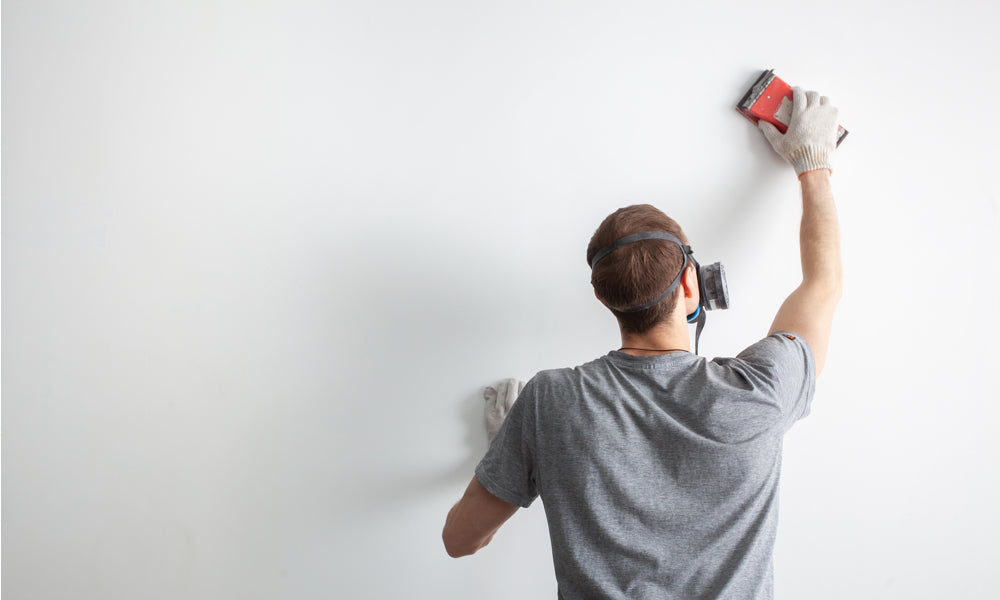
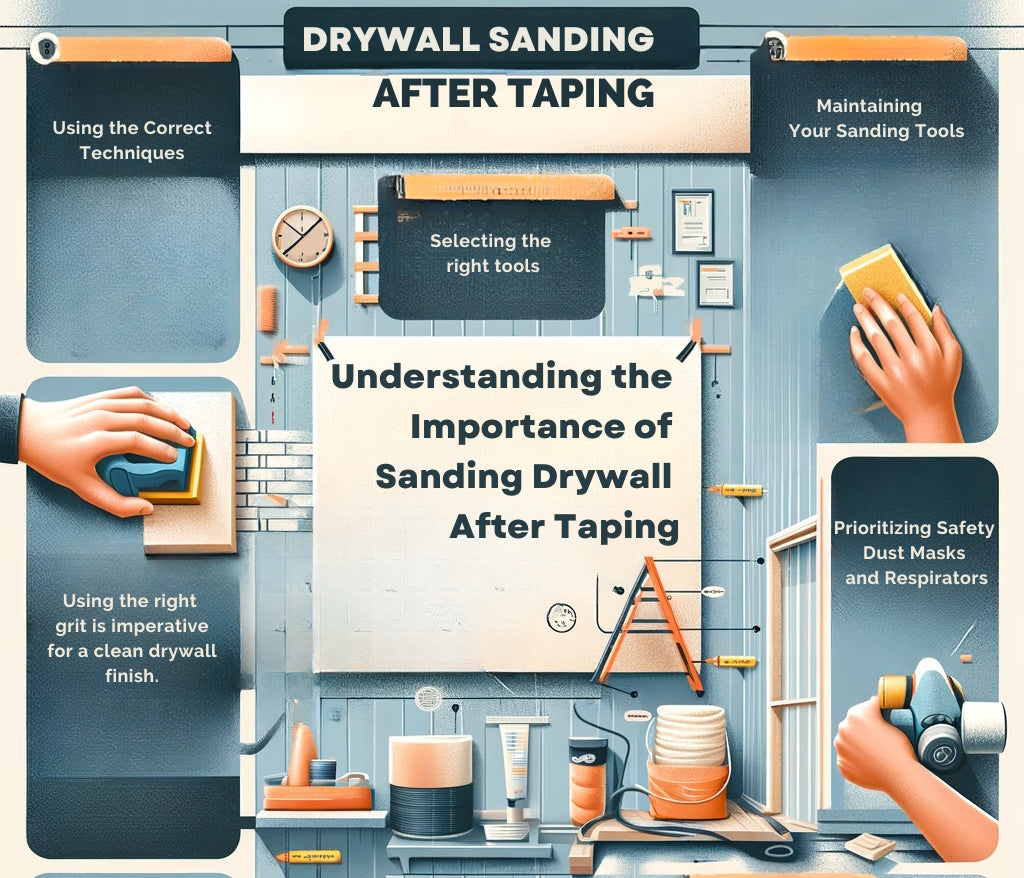
After taping, sanding the drywall is a crucial step to getting a smooth, perfect wall surface. Despite its apparent simplicity, this procedure calls for a careful balance of the appropriate methods, equipment, and safety measures to guarantee the finest outcomes. We'll walk you through all the nuances of drywall sanding in this guide, with an emphasis on the equipment and techniques that will guarantee a consistently high-quality finish.
The key to efficient drywall sanding lies in selecting the appropriate tools. At Timothy's Toolbox, a variety of sanding tools are available to cater to different needs and preferences. For detailed sanding work, sanding sponges and drywall abrasives offer precision and ease of use. For larger surfaces, drywall pole sanders are ideal, as they allow you to reach high areas comfortably and sand large surfaces more uniformly.
Sanding drywall generates a significant amount of dust, which can be harmful if inhaled. Therefore, it's crucial to use proper safety gear. A selection of respirators and dust masks from Timothy's Toolbox are available to shield you from breathing in dust. During the sanding process, selecting the appropriate mask or respirator is crucial for your health and safety.
For an even cleaner and more efficient sanding process, consider using dust-free sanders. By reducing the amount of airborne dust produced during sanding, these products help to make the procedure safer and cleaner. Timothy's Toolbox provides high-quality dust-free sanders that can significantly enhance your drywall finishing experience.
Effective sanding is not just about the tools; it's also about the technique. It's important to sand evenly and gently to avoid over-sanding, which can damage the drywall surface. For more detailed guidance on techniques, we have a blog that offers a comprehensive guide on how to properly use a sanding sponge on drywall, including tips and techniques for a smooth finish.
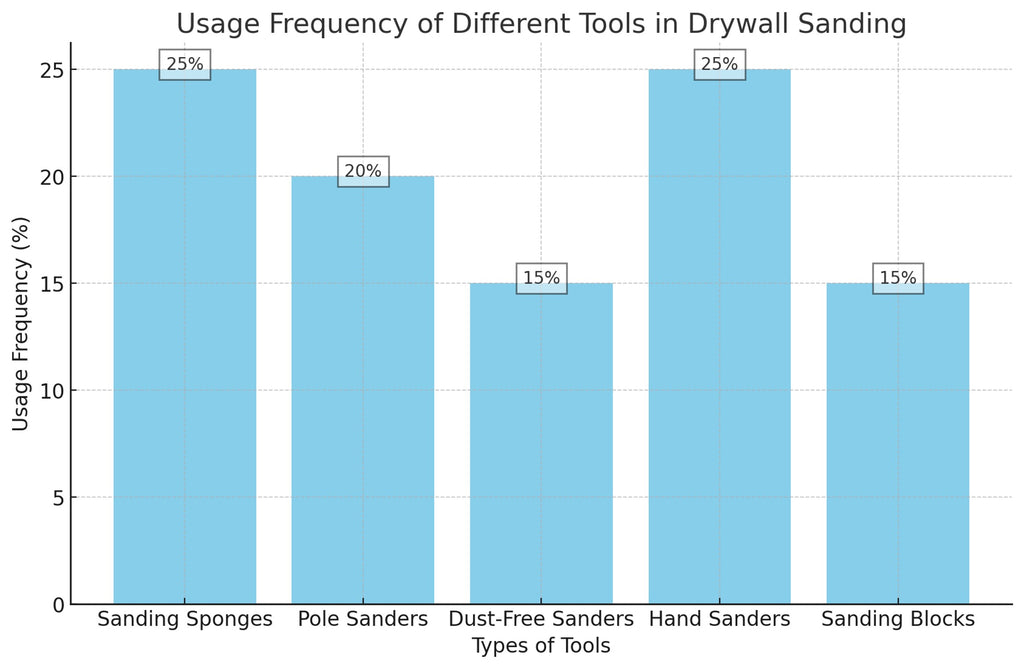
We polled drywall contractors and asked them the frequency of using each type of sanding tool for their jobs.
Once you have your tools and safety gear from Timothy's Toolbox, it's time to focus on the technique. Proper sanding technique is crucial for achieving a smooth, blemish-free surface. Here are some expert tips to help you sand like a pro.
This technique, when combined with the right tools, can significantly improve the quality of your drywall finish.
The grit of the sandpaper plays a crucial role in the sanding process. Using the wrong grit can either lead to inefficient sanding or damage the drywall. Make sure you have a wide variety of sponges and abrasives to ensure you have the right grit for every stage of your project.
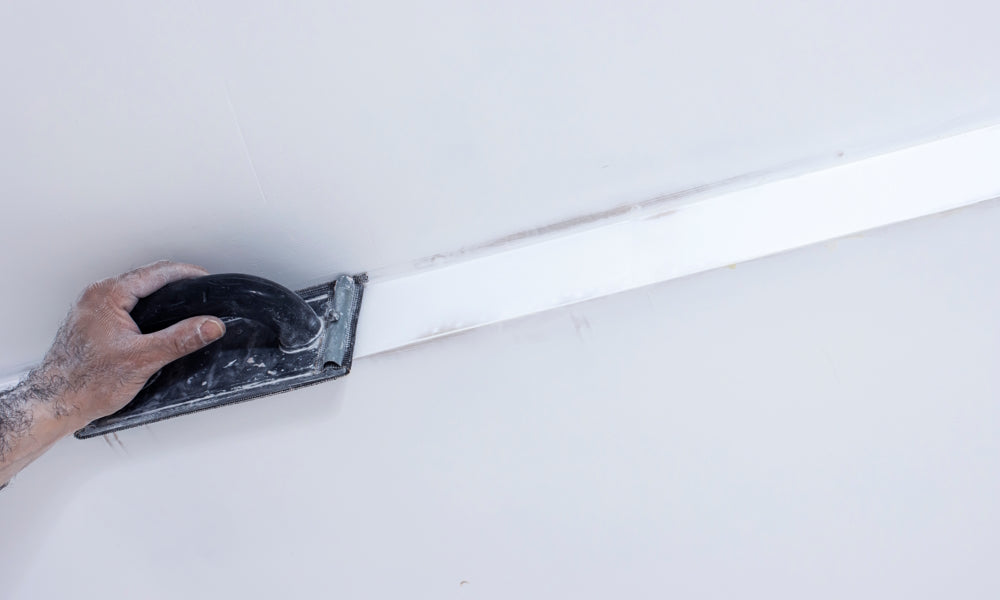
Sanding corners and edges requires special attention. For this delicate task, sanding sponges are particularly useful. Their flexibility allows for precise sanding in tight spaces, ensuring a uniform finish across the entire wall. Many professionals also turn to hand sanders for this task.
While dust masks and respirators are essential, minimizing dust creation is equally important. Dust-free sanders from Timothy's Toolbox are designed to keep the work environment cleaner and safer.
Efficiency and safety in drywall sanding are not mutually exclusive. You can achieve a flawless finish while maintaining a safe working environment by using the proper tools and techniques.
Dust-free sanders represent the latest in sanding technology, offering both efficiency and health benefits. By trapping dust before it becomes airborne, these tools make the sanding process cleaner and safer.
No sanding job is complete without the appropriate safety gear. A good quality dust mask or respirator is non-negotiable for protecting your lungs from harmful drywall dust.
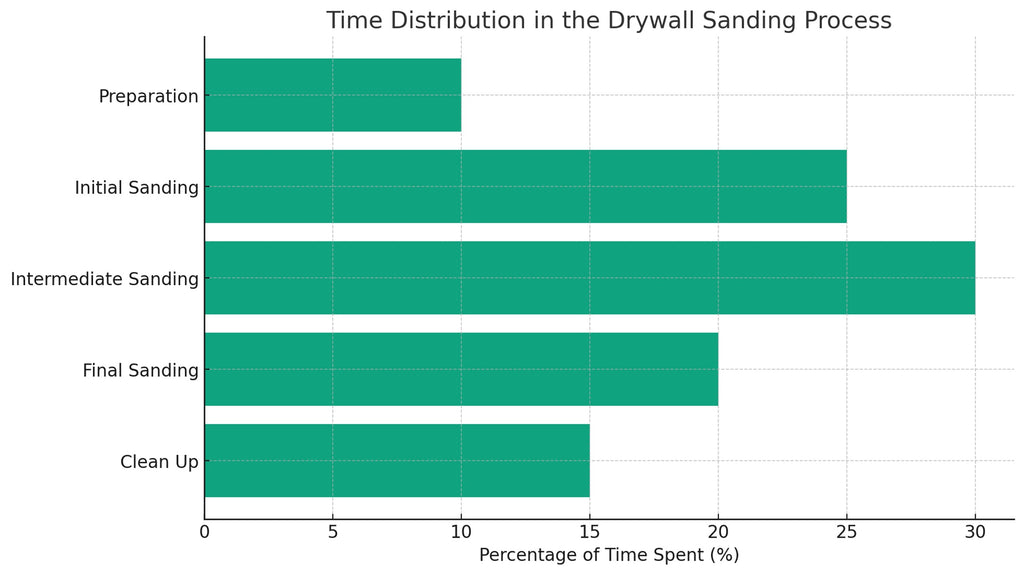
Achieving a perfectly smooth wall is all about the final touches in the sanding process. This stage requires a keen eye and a gentle hand to ensure that your drywall is flawlessly prepared for painting or texturing.
Knowing when to stop is as important as knowing how to sand. Look for a uniform, smooth surface without any visible seams or ridges. Good lighting is key to spotting imperfections. If you're not sure, lightly run your hand over the surface to feel for any uneven areas.
The smoothness required for your drywall depends on your next step:
Using dust-free sanders can greatly reduce the amount of airborne dust. Additionally, regular cleaning during the sanding process helps maintain a healthier work environment.
Proper maintenance of your sanding tools extends their life and ensures their readiness for your next project. Here’s how you can keep your tools from Timothy's Toolbox in top condition:
Sanding drywall after taping is a critical step in achieving a professional and polished look for your walls. Let's summarize the key insights and best practices to ensure your drywall sanding is successful.
Remember, the key to a successful drywall project is patience, the right tools, and the correct techniques. Whether you're a seasoned professional or a DIY enthusiast, following these guidelines will help you achieve the perfect finish on your drywall.
Visit Timothy's Toolbox, your one-stop-shop for industry-leading products and expert advice, for more information on tools, techniques, and tips for drywall sanding and other construction projects.
{"one"=>"Select 2 or 3 items to compare", "other"=>"{{ count }} of 3 items selected"}
Leave a comment